Netstat tips and tricks for Windows Server admins

Maintaining command-line finesse is an important objective for Windows Server administrators. Rick Vanover offers some pointers on using the netstat command. 
Netstat is a command that some Windows Server admins use every day, while others only use it when there is a problem. I fall into the latter category; I use netstat as a diagnosis tool when something has gone awry, or when I am trying to track something down.
The 10 parameters to the Windows netstat command can display scores of additional information for troubleshooting or everyday use. The most common iteration of netstat is to use the -a parameter, which displays all connections and listening ports. However, netstat displays useful information even without parameters. Here are some pointers on using the netstatcommand:
Fully qualified domain name: The -f parameter will display the fully qualified domain name (FQDN) of the foreign address in the netstat display. This will resolve names internally and externally if possible. Figure A shows the FQDN resolution within netstatFigure A
What process is running on the open port: Tracking down which process identifier (PID) has a port open is quite easy when netstat is run with the -a -n -o combination of parameters. Read my Windows Server 2008 tip on this sequence of commands, and see it in action in Figure B.Figure B
You can take this one step further with the implementation of friendly names for each process with the -b netstat parameter. This parameter requires administrative permissions and is shown in Figure CFigure C
Note that the remote addresses pointing to the 192.168.1.220:3261 address are the Windows iSCSI initiator service and display differently than the other services listed.
Display routing table: If you need to determine why one system has a different experience than another on the same network, netstat can display a route of the current system with the -rparameter. Figure D shows this in use (note the persistent routes section that would display any static routes added to the Windows Server). Figure D
These four netstat commands can greatly add to the troubleshooting efforts for Windows administrators. How else do you use netstat? Share your tips in the discussion.

ipconfig


ipconfig is a commmand line utility available on all versions of Microsoft Windows starting with Windows NT. ipconfig is designed to be run from the Windows command prompt. This utility allows you to get the IP address information of a Windows computer. It also allows some control over active TCP/IP connections. ipconfig is an alternative to the older 'winipcfg' utility.

ipconfig Usage

From the command prompt, type 'ipconfig' to run the utility with default options. The output of the default command contains the IP address, network mask and gateway for all physical and virtual network adapters.
'ipconfig' supports several command line options as described below. The command "ipconfig /?" displays the set of available options.

ipconfig /all

This option displays the same IP addressing information for each adapter as the default option. Additionally, it displays DNS and WINS settings for each adapter.

ipconfig /release

This option terminates any active TCP/IP connections on all network adapters and releases those IP addresses for use by other applications. 'ipconfig /release" can be used with specific Windows connection names. In this case, the command will affect only the specified connections and not all. The command accepts either full connection names or wildcard names. Examples:
    ipconfig /release "Local Area Connection 1"
    ipconfig /release *Local*

ipconfig /renew

This option re-establishes TCP/IP connections on all network adapters. As with the release option, ipconfig /renew takes an optional connection name specifier.
Both /renew and /release options only work on clients configured for dynamic (DHCP) addressing.
Note: The remaining options below are only available on Windows 2000 and newer versions of Windows.

ipconfig /showclassid, ipconfig /setclassid

These options manage DHCP class identifiers. DHCP classes can be defined by administrators on a DHCP server to apply different network settings to different types of clients. This is an advanced feature of DHCP typically used in business networks, not home networks.

ipconfig /displaydns, ipconfig /flushdns

These options access a local DNS cache that Windows maintains. The /displaydns option prints the contents of the cache, and the /flushdns option erases the contents.
This DNS cache contains a list of remote server names and the IP addresses (if any) they correspond to. Entries in this cache come from DNS lookups that happen when attempting to visit Web sites, named FTP servers, and other remote hosts. Windows uses this cache to improve the performance of Internet Explorer and other Web-based applications.
In home networking, these DNS options are sometimes useful for advanced troubleshooting. If the information in your DNS cache becomes corrupted or outdated, you could face difficulty accessing certain sites on the Internet. Consider these two scenarios:
  • The IP address of a Web site, email server or other server changes (rare occurence). The name and address of this site normally stay in your cache for 24 hours after your last visit. You may need to clear your cache to access the server sooner.
  • A Web site or other server was offline when you last visited it (hopefully a rare occurence) but since has come back online. The cache will normally keep a record that the server is offline for 5 minutes afer your last visit. You may need to clear your cache to access the server sooner.

ipconfig /registerdns

Similar to the above options, this option updates DNS settings on the Windows computer. Instead of merely accessing the local DNS cache, however, this option initiates communication with both the DNS server (and the DHCP server) to re-register with them.
This option is useful in troubleshooting problems involving connection with the Internet service provider, such as failure to obtain a dynamic IP address or failure to connect to the ISP DNS server.
Like the /release and /renew options, /registerdns optionally takes the name(s) of specific adapters to update. If no name parameter is specified, /registerdns updates all adapter

Basic Telnet Tutorial

Telnet was developed in 1969 to aid in remote connectivity between computers over a network. Telnet can connect to a remote machine that on a network and is port listening. Most common ports to which one can connect to through telnet are:
Port 21 - File Transfer Protocol
Port 22 - SSH Remote Login Protocol
Port 23 - Telnet Server
Port 25 - Simple Mail Transfer Protocol (SMTP)
Port 53 - Domain Name Server (DNS)
Port 69 - Trivial File Transfer Protocol (TFTP)
Port 70 - Gopher
Port 80 - Hyper Text Transfer Protocol (HTTP)
Port 110 - Post Office Protocol 3 (POP3)

Telnet can be used to connect to virtually any machine that listens on ports. In other words, you can connect to any machine that has certain ports open. Once connected to a machine, you need to issue unix based commands to interact with the remote service. For example, a user don't need to login, check and send mails only through his email service provider's interface but this can be achieved using simple telnet commands. It is because of this reason that many hackers can send spoofed emails or access information such as which services are running on the remote machine. This is also called banner grabbing or daemon tracking. Black hat hackers can also use telnet to sniff network packets which might contain sensitive information such as usernames and passwords. This is achieved by using telnet and network utilities such as tcpdump and wireshark.

Telnet client and server functionality comes built-in in most operating systems. However, there are several third-party applications like putty client that enable remote connectivity. A user can connect to a remote machine through several access modes such as raw access, SSH access, etc. SSH mode offers encryption and security and hence can prevent eavesdropping by hackers. This is by far the most secure way of connecting to a machine. However, it is necessary that the remote machine supports SSH login to make use of the encryption and security features.

On windows machines, telnet client can simply be started by issuing the telnet command in windows command shell. The following example would help you connect to a remote machine on the HTTP Port 80 and issue a GET command which would fetch a file as your web browser does it behind scenes:

Command Prompt> Telnet
Command Prompt> open (somedomain.com or ip address) 80

At this stage, you would be connected to somedomain.com or ip address on port 80 and the daemon that is running on port 80 (most probably HTTP Server) would be waiting for HTTP requests.

GET / HTTP/1.1
host: somedomain.com (or ip address)
Issuing the command above would make the HTTP Server return the file requested, in this case it would be the default file at the root location. You can find some additional basic telnet commands at the Microsoft Technet library -http://technet.microsoft.com/en-us/library/c.aspx
Most applications and embedded devices make use of the telnet technology to connect to remote server machines and provide end user functionality. The most common use of telnet stands to enable remote authentication and access.

Resepi Biskut Aiskrim Strawberry


Bahan-Bahan

260 gm butter
120 gm gula icing
320 gm tepung gandum
60 gm tepung jagung
40 gm tepung ubi
1/2 sudu teh baking powder
40 gm serbuk badam
Sdkt vanilla essence
2 sudu teh strawberry emulco
sedikit pewarna pink/merah
1 biji kuning telur utk sapu atas biskut
Topping coklat dan manik2/bunga sebagai hiasan

Cara-Caranya

- Pukul butter dan gula sehingga kembang.
- Kemudian campurkan tepung-tepung yang telah diayak bersama baking powder dan juga serbuk badam. - - Gaul rata sehingga menjadi doh.
- Canai doh dan kemudian gelek dan terap dengan acuan ais krim.
- Atur diatas loyang pembakar. Sapukan telur diatas biskut dan bakar pada suhu 150 degree selama 25 minit atau sehingga ia masak.
- Biarkan biskut benar2 sejuk, barulah celup dngn coklat cair.
-  Celup hujung biskut dengan coklat dan tabur manik berwarna diatas coklat tersebut.
= Hias biskut ikut creativiti anda.

Resepi Biskut Aiskrim Nestum


Resepi Biskut Aiskrim Nestum

Bahan-bahan:

200 gm tepung gandum
70 gm tepung kastad
160 gm nestum (Boleh kisar nestum ni)
75 gm gula halus
180 gm butter
1 biji telur
1/2 tsp serbuk penaik
Bahan hiasan:
250 gm coklat masakan (Cairkan secara double boiler)
Gula manik atau apa-apa hiasan yang sesuai


Cara-cara:

- Ayak tepung gandum, tepung kastad dan serbuk penaik. Kemudian satukan dengan nestum.
- Dalam satu mangkuk lain, putar butter dan gula hingga gebu dan warna menjadi pucat.
- Masukkan telur dan pukul rata.
- Masukkan bahan ayak dan uli hingga menjadi doh.
- Canai dan terap dengan acuan bentuk aiskrim.
- Bakar dalam oven pada suhu 160 C sehingga biskut masak. Sejukkan di atas redai.
- Celupkan hujung biskut ke dalam coklat yang telah dicairkan dan taburkan gula hiasan di atasnya.
- Setelah coklat mengeras, simpan biskut di dalam bekas kedap udara.

Resepi Biskut Daisy


Bahan-Bahan:

Bahan topping:

160 gm mentega
160 gm tepung gandum
60 gm gula aising
60 gm tepung gandum
2 sudu kecil pes strawberi 250 gm mentega
60 gm gula aising
220 gm tepung gandum
240 gm tepung jagung
1 sudu kecil esen vanila

Cara:

1. Pukul mentega dan gula hingga kembang.
2. Masukkan tepung dan gaul sebati hingga manjadi doh. Canai dan terap.
3. Untuk topping, pukul mentega dan gula hingga sebati.
4. Masukkan pes strawberi dan tepung.
5. Uli hingga menjadi doh lembut.
6. Masukkan ke dalam nozel dan picitkan ke atas doh yang sudah diterap tadi.

Resepi Biskut Ferrero Rocher


BISKUT FERRERO ROCHER

Bahan-bahan:
250gm butter
80gm gula icing
20gm qroquant/cornfleks hancur
360gm tpg gandum
100gm almond powder
40gm tpg jagung
1/2 sdt esen vanilla
almond nibs secukupnya (utk menyalut biskut)
3bj putih telur (utk melekatkan almond nibs dgn biskut)
coklat masakan secukupnya.(utk menyalut biskut)

Cara-cara:

-putar butter & gula sebati.masukkan qroquant.
-masukkan esen vanilla.
-masukkan tpg gandum,almond powder & tpg jagung. uli sebati.
-panaskan oven suhu 150c.
-bulatkan adunan mengikut saiz yg dikehendaki.letakkan dlm dulang pembakar yg sudah dilengser dgn marjerin.
-bakar suhu 150c selama 20-25 minit.
-golekkan biskut yg telah dibakar ke dalam telur putih.kemudian golekkan di atas almond nibs.
-bakar balik biskut lebih kurang 5 minit.
-cairkan coklat masakan & golekkan biskut dlm coklat & masukkan ke dlm paper cup.biarkan sejuk & siap utk dihidang...;)

SELAMAT MENCUBA!..;)

Resepi Kek Coklat Moist Kukus Cara Mudah

Resepi Kek Coklat
1 cawan serbuk coklat
1 cawan gula
1 cawan minyak masak (boleh ganti dengan buttercup)
1 1/2 cawan tepung gandum
1 tin susu cair
1 1/2 sudu kecil soda bikabonat
1 1/2 sudu kecil serbuk penaik
2 biji telur

Hiasan Kek
1 bar coklat masakan
Coklat rice/atau apa-apa hiasan yang menarik untuk kek
Cara-cara masakan;
1) Sebelum kita bancuh bahan-bahan, didihkan air didalam alat kukusan.
2) Sementara tunggu air mendidih, kita mulai adunan dengan ambil 2 biji telur dan dipukul sehingga kembang.
2) Coklat, gandum, gula, serbuk penaik dan soda bikarbonat digaul sekali.
3) Susu cair dan minyak masak dicampur ke dalam telur yang telah dipukul sehingga kembang.
4) Campur adunan di dalam langkah 2 ke dalam langkah 3.
5) Kacau sehingga sebati.
7) Sediakan loyang kek yang sudah disapu dengan majerin dan masukkan adunan kek yang sudah sebati.
8 ) Kukus sehingga masak kira-kira 45 minit. (tempoh masa kek siap masak bergantung kepada saiz loyang kek dan saiz api yang digunakan tapi sebaiknya pantau pada masa 30 minit)
*untuk cek masak ke tak kek ini boleh cek dengan cucuk kek menggunakan lidi. kalau takde apa yang melekat pada lidi bermakna kek tue dah masak.
9) Selepas masak, cairkan bar coklat dan sapu di atas dan sekeliling kek.
10) Letakkan hiasan dan masukkan ke dalam peti sejuk untuk keraskan coklat hiasan.

BUAT DUIT DENGAN HANYA BEKERJA DIRUMAH SAHAJA

Jobdirumah ini adalah sebuah websites yang memberi latihan dengan tawaran kerja-kerja jenis pekerjaan freelance yang bertanggungjawab untuk mengumpul maklumat dari internet, memasukkan maklumat ke dalam sistem, membuat kajian maklumat yang dikumpul, menyediakan laporan dan kerja-karja am yang berkaitan.


cara buat duit, cara jana wang di internet, review jobdirumah,cara buat duit dengan jobdirumah, review positif jobdirumah, cara buat wang tunag di internet, cara buat wang dengan jobdirumah, jobdirumah.com scam, jobdirumah.com tidak scam,komen pengguna jobdirumah,komen job dirumah

Setelah anda mengikuti program latihan bekerja dirumah ini, anda boleh mendapat 2 pendapatan sampingan:

A. Dengan menjadi freelance
  • Anda bekerja dengan majikan antarabangsa. Siapkan projek yang diberikan oleh majikan. Setelah majikan berpuas hati dengan hasil kerja anda, majikan akan memberikan anda bayaran yang telah dijanjikan dalam USD (3 kali ganda dari wang Malaysia).
B. Dengan menjadi agen affiliate
  • Kerja anda mudah sahaja. Anda akan diberikan ID untuk melakukan promosi website Jobdirumah. Jika ada yang menyertai, anda akan dibayar melalui bank Malaysia pada hari Isnin-Jumaat.
Program latihan ini dikenakan bayaran RM50 adalah untuk bayaran khidmat latihan yang diberikan kepada anda dan juga membayar kepada agen yang mempromosikan website mereka.

Antara tugasan yang perlu anda lakukan ialah :
  • Data Entry
  • Menaip Dokumen
  • Mengumpul Maklumat
  • Menulis Artikal
  • Menulis Laporan
  • Khidmat Pelanggan
  • Pembantu Maya
  • Tugas Perkeranian
  • Dan banyak lagi....

Anda risau ianya scam ?? Jangan bimbang, Jobdirumah terbukti membayar para freelancer seperti anda dan terdapat banyak review positif terhadap laman Jobdirumah.

cara buat duit, cara jana wang di internet, review jobdirumah,cara buat duit dengan jobdirumah, review positif jobdirumah, cara buat wang tunag di internet, cara buat wang dengan jobdirumah, jobdirumah.com scam, jobdirumah.com tidak scam,komen pengguna jobdirumah,komen job dirumah

cara buat duit, cara jana wang di internet, review jobdirumah,cara buat duit dengan jobdirumah, review positif jobdirumah, cara buat wang tunag di internet, cara buat wang dengan jobdirumah, jobdirumah.com scam, jobdirumah.com tidak scam,komen pengguna jobdirumah,komen job dirumah

Yuran pendaftaran cuma RM50 seumur hidup, namun pulangannya hampir setiap hari! Sekiranya anda berminat sila layari laman dibawah sekarang.

Hacking Using SqlMap

Install SQLMAP di Windows XP , 7 , 8

   Selamat malam reader :)
Sekarang ini saya mau share tentang SQLMAP di windows.. Sebenernya main SQLMAP di windows ini emang agak ribet.. Dari mulai mendownload Python , active python dan yg terakhir mendownlaoad SQLMAP nya..
Untuk command SQLMAP di windows dengan di Linux tetep sama kok, jadi gak perlu khawatir...
 Oke langsung saja,  
  1. Download python, dan yg pasti buat windows.. download versi yg berapa saja..Download pyhton disini .. 
  2. Download Active Python , agar SQLMAP dapat berjalan Download Active Python
  3. Dan yg terakhir download SLQMAP .. Download SQLMAP disini 
Kalau sudah terdownload semua.. di lakukan untuk instalasi Python dan Active Phyton.. Tunggu sampai selesai, dan di lanjut dengan SQLMAP nya..
Extract SQLMAP nya di directory mana saja..
Dan cara untuk menggunakan SQLMAP nya adalah dengan membuka CMD dan masuk ke dalam directory dimana agan agan menyimpan SQLMAP 

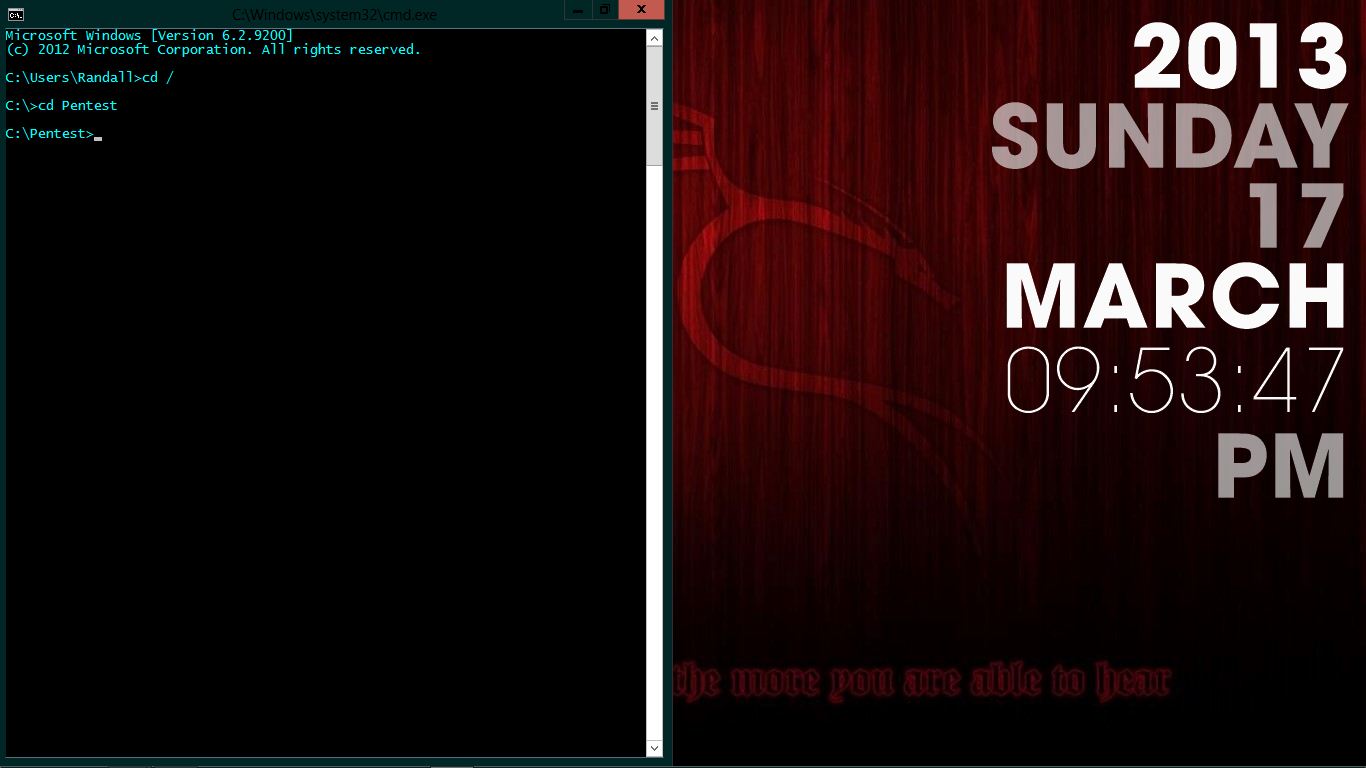
Contoh : Saya menyimpan SQLMAP di directory C:/ --> Pentest --> SQLMAP


SQLMAP berjalan =))
Sekian dari saya..
Semoga bermanfaat :)

How to create REST API for Android app using PHP, Slim and MySQL – Day 2/2


we have learned fundamental concepts about REST API and preparing your development environment ready by installing the required tools needed. I hope everyone got good knowledge about REST and other technical areas. Also I am assuming that you got all the required tools installed.

android rest api design using php mysql slim

8. Starting PHP Project

As we all know IDEs make development process easier. So I recommend you use an IDE for developing the PHP project instead of using plain notepad. You can go for Eclipse, Aptana Studio, PhpStorm or Netbeans. But I personally felt very comfortable using Netbeans for PHP projects.
PHP Project directory structure
The following diagram will give you an idea about the directory structure of the project which we are going to develop now.
task manager rest api php project directory structure
libs – All the third party libraries goes here. In our case we place Slim library here
include – All the helpers classes we build placed here
index.php – Takes care of all the API requests
.htaccess – Rules for url structure and other apache rules
Now let’s start the PHP project
1. Go to the directory where WAMP is installed. In general wamp will be installed in C:\wamp. (If you have installed any other software rather than WAMP, you should go to the directory recommended by that software).
2. As a first step we start with creating required directories. Inside wamp folder go to www folder (c:\wamp\www\) and create a folder named task_manager. This folder will be the parent directory of our project. Inside task_manager create two more folders named libs, include and v1.
3. Now the paste the Slim library inside libs folder. The download link for Slim is provided in previous part.
4. Normally Slim framework works when index.php includes in the url which makes url not well-formed. So using the .htacess rules we can get rid of index.php from the url and make some friendly urls. Inside v1 folder create a file named .htaccess and paste the following code. (Note that this file name shouldn’t include any additional extension in the name like .txt)
.htaccess
RewriteEngine On
RewriteCond %{REQUEST_FILENAME} !-f
RewriteRule ^(.*)$ %{ENV:BASE}index.php [QSA,L]

8.1 Preparing Helper Classes

First we start writing set of helper classes required in this project. These helper classes provides necessary functions required to interact with the database.
5. Inside include folder create file named Config.php with following content. This file contains the entire project configuration like database connection parameters and other variables.
Config.php
<?php
/**
 * Database configuration
 */
define('DB_USERNAME', 'root');
define('DB_PASSWORD', '');
define('DB_HOST', 'localhost');
define('DB_NAME', 'task_manager');
define('USER_CREATED_SUCCESSFULLY', 0);
define('USER_CREATE_FAILED', 1);
define('USER_ALREADY_EXISTED', 2);
?>
6. Create another class named DbConnect.php This class file mainly takes care of database connection.
DbConnect.php
<?php
/**
 * Handling database connection
 *
 * @author Ravi Tamada
 */
class DbConnect {
    private $conn;
    function __construct() {       
    }
    /**
     * Establishing database connection
     * @return database connection handler
     */
    function connect() {
        include_once dirname(__FILE__) . './Config.php';
        // Connecting to mysql database
        $this->conn = new mysqli(DB_HOST, DB_USERNAME, DB_PASSWORD, DB_NAME);
        // Check for database connection error
        if (mysqli_connect_errno()) {
            echo "Failed to connect to MySQL: " . mysqli_connect_error();
        }
        // returing connection resource
        return $this->conn;
    }
}
?>
Encrypting the password
7. The best way to secure the user passwords is not store them as plain text, instead all the passwords should be encrypted before storing in db. The following class takes care of encrypting the user password. Create another file named PassHash.php and paste the following code.
PassHash.php
<?php
class PassHash {
    // blowfish
    private static $algo = '$2a';
    // cost parameter
    private static $cost = '$10';
    // mainly for internal use
    public static function unique_salt() {
        return substr(sha1(mt_rand()), 0, 22);
    }
    // this will be used to generate a hash
    public static function hash($password) {
        return crypt($password, self::$algo .
                self::$cost .
                '$' . self::unique_salt());
    }
    // this will be used to compare a password against a hash
    public static function check_password($hash, $password) {
        $full_salt = substr($hash, 0, 29);
        $new_hash = crypt($password, $full_salt);
        return ($hash == $new_hash);
    }
}
?>
8. Now create another class named DbHandler.php This class is one of the important files in our project which provides necessary functions to perform CRUD operations on the database. Every function is self explanatory by it’s name and comments, I don’t have to have to explain much about them.
DbHandler.php
<?php
/**
 * Class to handle all db operations
 * This class will have CRUD methods for database tables
 *
 * @author Ravi Tamada
 */
class DbHandler {
    private $conn;
    function __construct() {
        require_once dirname(__FILE__) . './DbConnect.php';
        // opening db connection
        $db = new DbConnect();
        $this->conn = $db->connect();
    }
    /* ------------- `users` table method ------------------ */
    /**
     * Creating new user
     * @param String $name User full name
     * @param String $email User login email id
     * @param String $password User login password
     */
    public function createUser($name, $email, $password) {
        require_once 'PassHash.php';
        $response = array();
        // First check if user already existed in db
        if (!$this->isUserExists($email)) {
            // Generating password hash
            $password_hash = PassHash::hash($password);
            // Generating API key
            $api_key = $this->generateApiKey();
            // insert query
            $stmt = $this->conn->prepare("INSERT INTO users(name, email, password_hash, api_key, status) values(?, ?, ?, ?, 1)");
            $stmt->bind_param("ssss", $name, $email, $password_hash, $api_key);
            $result = $stmt->execute();
            $stmt->close();
            // Check for successful insertion
            if ($result) {
                // User successfully inserted
                return USER_CREATED_SUCCESSFULLY;
            } else {
                // Failed to create user
                return USER_CREATE_FAILED;
            }
        } else {
            // User with same email already existed in the db
            return USER_ALREADY_EXISTED;
        }
        return $response;
    }
    /**
     * Checking user login
     * @param String $email User login email id
     * @param String $password User login password
     * @return boolean User login status success/fail
     */
    public function checkLogin($email, $password) {
        // fetching user by email
        $stmt = $this->conn->prepare("SELECT password_hash FROM users WHERE email = ?");
        $stmt->bind_param("s", $email);
        $stmt->execute();
        $stmt->bind_result($password_hash);
        $stmt->store_result();
        if ($stmt->num_rows > 0) {
            // Found user with the email
            // Now verify the password
            $stmt->fetch();
            $stmt->close();
            if (PassHash::check_password($password_hash, $password)) {
                // User password is correct
                return TRUE;
            } else {
                // user password is incorrect
                return FALSE;
            }
        } else {
            $stmt->close();
            // user not existed with the email
            return FALSE;
        }
    }
    /**
     * Checking for duplicate user by email address
     * @param String $email email to check in db
     * @return boolean
     */
    private function isUserExists($email) {
        $stmt = $this->conn->prepare("SELECT id from users WHERE email = ?");
        $stmt->bind_param("s", $email);
        $stmt->execute();
        $stmt->store_result();
        $num_rows = $stmt->num_rows;
        $stmt->close();
        return $num_rows > 0;
    }
    /**
     * Fetching user by email
     * @param String $email User email id
     */
    public function getUserByEmail($email) {
        $stmt = $this->conn->prepare("SELECT name, email, api_key, status, created_at FROM users WHERE email = ?");
        $stmt->bind_param("s", $email);
        if ($stmt->execute()) {
            $user = $stmt->get_result()->fetch_assoc();
            $stmt->close();
            return $user;
        } else {
            return NULL;
        }
    }
    /**
     * Fetching user api key
     * @param String $user_id user id primary key in user table
     */
    public function getApiKeyById($user_id) {
        $stmt = $this->conn->prepare("SELECT api_key FROM users WHERE id = ?");
        $stmt->bind_param("i", $user_id);
        if ($stmt->execute()) {
            $api_key = $stmt->get_result()->fetch_assoc();
            $stmt->close();
            return $api_key;
        } else {
            return NULL;
        }
    }
    /**
     * Fetching user id by api key
     * @param String $api_key user api key
     */
    public function getUserId($api_key) {
        $stmt = $this->conn->prepare("SELECT id FROM users WHERE api_key = ?");
        $stmt->bind_param("s", $api_key);
        if ($stmt->execute()) {
            $user_id = $stmt->get_result()->fetch_assoc();
            $stmt->close();
            return $user_id;
        } else {
            return NULL;
        }
    }
    /**
     * Validating user api key
     * If the api key is there in db, it is a valid key
     * @param String $api_key user api key
     * @return boolean
     */
    public function isValidApiKey($api_key) {
        $stmt = $this->conn->prepare("SELECT id from users WHERE api_key = ?");
        $stmt->bind_param("s", $api_key);
        $stmt->execute();
        $stmt->store_result();
        $num_rows = $stmt->num_rows;
        $stmt->close();
        return $num_rows > 0;
    }
    /**
     * Generating random Unique MD5 String for user Api key
     */
    private function generateApiKey() {
        return md5(uniqid(rand(), true));
    }
    /* ------------- `tasks` table method ------------------ */
    /**
     * Creating new task
     * @param String $user_id user id to whom task belongs to
     * @param String $task task text
     */
    public function createTask($user_id, $task) {       
        $stmt = $this->conn->prepare("INSERT INTO tasks(task) VALUES(?)");
        $stmt->bind_param("s", $task);
        $result = $stmt->execute();
        $stmt->close();
        if ($result) {
            // task row created
            // now assign the task to user
            $new_task_id = $this->conn->insert_id;
            $res = $this->createUserTask($user_id, $new_task_id);
            if ($res) {
                // task created successfully
                return $new_task_id;
            } else {
                // task failed to create
                return NULL;
            }
        } else {
            // task failed to create
            return NULL;
        }
    }
    /**
     * Fetching single task
     * @param String $task_id id of the task
     */
    public function getTask($task_id, $user_id) {
        $stmt = $this->conn->prepare("SELECT t.id, t.task, t.status, t.created_at from tasks t, user_tasks ut WHERE t.id = ? AND ut.task_id = t.id AND ut.user_id = ?");
        $stmt->bind_param("ii", $task_id, $user_id);
        if ($stmt->execute()) {
            $task = $stmt->get_result()->fetch_assoc();
            $stmt->close();
            return $task;
        } else {
            return NULL;
        }
    }
    /**
     * Fetching all user tasks
     * @param String $user_id id of the user
     */
    public function getAllUserTasks($user_id) {
        $stmt = $this->conn->prepare("SELECT t.* FROM tasks t, user_tasks ut WHERE t.id = ut.task_id AND ut.user_id = ?");
        $stmt->bind_param("i", $user_id);
        $stmt->execute();
        $tasks = $stmt->get_result();
        $stmt->close();
        return $tasks;
    }
    /**
     * Updating task
     * @param String $task_id id of the task
     * @param String $task task text
     * @param String $status task status
     */
    public function updateTask($user_id, $task_id, $task, $status) {
        $stmt = $this->conn->prepare("UPDATE tasks t, user_tasks ut set t.task = ?, t.status = ? WHERE t.id = ? AND t.id = ut.task_id AND ut.user_id = ?");
        $stmt->bind_param("siii", $task, $status, $task_id, $user_id);
        $stmt->execute();
        $num_affected_rows = $stmt->affected_rows;
        $stmt->close();
        return $num_affected_rows > 0;
    }
    /**
     * Deleting a task
     * @param String $task_id id of the task to delete
     */
    public function deleteTask($user_id, $task_id) {
        $stmt = $this->conn->prepare("DELETE t FROM tasks t, user_tasks ut WHERE t.id = ? AND ut.task_id = t.id AND ut.user_id = ?");
        $stmt->bind_param("ii", $task_id, $user_id);
        $stmt->execute();
        $num_affected_rows = $stmt->affected_rows;
        $stmt->close();
        return $num_affected_rows > 0;
    }
    /* ------------- `user_tasks` table method ------------------ */
    /**
     * Function to assign a task to user
     * @param String $user_id id of the user
     * @param String $task_id id of the task
     */
    public function createUserTask($user_id, $task_id) {
        $stmt = $this->conn->prepare("INSERT INTO user_tasks(user_id, task_id) values(?, ?)");
        $stmt->bind_param("ii", $user_id, $task_id);
        $result = $stmt->execute();
        $stmt->close();
        return $result;
    }
}
?>
8.2 Handling the API calls

Now we have all the required classes for the REST API. Now we can start the code to handle all individual api calls.
8. Inside v1 folder create a file named index.php and add the following code. Here we are including required libraries and other helper functions.
verifyRequiredParams() – This function verifies the mandatory parameters in the request.
validateEmail() – Verifies whether email address is valid one or not.
echoRespnse() – This function will echo the JSON response with a status code.
index.php
<?php
require_once '../include/DbHandler.php';
require_once '../include/PassHash.php';
require '.././libs/Slim/Slim.php';
\Slim\Slim::registerAutoloader();
$app = new \Slim\Slim();
// User id from db - Global Variable
$user_id = NULL;
/**
 * Verifying required params posted or not
 */
function verifyRequiredParams($required_fields) {
    $error = false;
    $error_fields = "";
    $request_params = array();
    $request_params = $_REQUEST;
    // Handling PUT request params
    if ($_SERVER['REQUEST_METHOD'] == 'PUT') {
        $app = \Slim\Slim::getInstance();
        parse_str($app->request()->getBody(), $request_params);
    }
    foreach ($required_fields as $field) {
        if (!isset($request_params[$field]) || strlen(trim($request_params[$field])) <= 0) {
            $error = true;
            $error_fields .= $field . ', ';
        }
    }
    if ($error) {
        // Required field(s) are missing or empty
        // echo error json and stop the app
        $response = array();
        $app = \Slim\Slim::getInstance();
        $response["error"] = true;
        $response["message"] = 'Required field(s) ' . substr($error_fields, 0, -2) . ' is missing or empty';
        echoRespnse(400, $response);
        $app->stop();
    }
}
/**
 * Validating email address
 */
function validateEmail($email) {
    $app = \Slim\Slim::getInstance();
    if (!filter_var($email, FILTER_VALIDATE_EMAIL)) {
        $response["error"] = true;
        $response["message"] = 'Email address is not valid';
        echoRespnse(400, $response);
        $app->stop();
    }
}
/**
 * Echoing json response to client
 * @param String $status_code Http response code
 * @param Int $response Json response
 */
function echoRespnse($status_code, $response) {
    $app = \Slim\Slim::getInstance();
    // Http response code
    $app->status($status_code);
    // setting response content type to json
    $app->contentType('application/json');
    echo json_encode($response);
}
$app->run();
?>

The JSON response

On calling every API request a JSON response will be issued with a HTTP status code. On the client side you have to verify the response http status code. If the status is 200, the request is processed successfully. Also you can notice a “error” node in the response. If the error value is true, that means some error occurred while processing the user data.


Api Calls without Authentication (without API key in the request header)
These calls don’t have to include Api Key in the request header. The main purpose of these calls is to interact with database without any authentication. User registration and login comes under this category.

⇒ User Registration

In order to interact with the API, the user has to register in our system first. Once he registered an API key will be generated and stored in the database. This API key will be private to that user only.
9. Add the following code in index.php. This function handles user registration.
index.php
/**
 * User Registration
 * url - /register
 * method - POST
 * params - name, email, password
 */
$app->post('/register', function() use ($app) {
            // check for required params
            verifyRequiredParams(array('name', 'email', 'password'));
            $response = array();
            // reading post params
            $name = $app->request->post('name');
            $email = $app->request->post('email');
            $password = $app->request->post('password');
            // validating email address
            validateEmail($email);
            $db = new DbHandler();
            $res = $db->createUser($name, $email, $password);
            if ($res == USER_CREATED_SUCCESSFULLY) {
                $response["error"] = false;
                $response["message"] = "You are successfully registered";
                echoRespnse(201, $response);
            } else if ($res == USER_CREATE_FAILED) {
                $response["error"] = true;
                $response["message"] = "Oops! An error occurred while registereing";
                echoRespnse(200, $response);
            } else if ($res == USER_ALREADY_EXISTED) {
                $response["error"] = true;
                $response["message"] = "Sorry, this email already existed";
                echoRespnse(200, $response);
            }
        });
In the following table you can find the API request information about the URL, HTTP method and the parameters needed to be posted.
URL/register
MethodPOST
Paramsname, email, password
Upon the successful registration the following json response will be issued.
{
    "error": false,
    "message": "You are successfully registered"
}
If the request is missing mandatory parameters the following json will be issued.
{
    "error": true,
    "message": "Required field(s) email, password is missing or empty"
}

⇒ User Login

10. Add the following code to handle user login. After verifying user credentials, the API Key for that user will be issued in the json response. The api key should be included in the request header in all remaining api calls.
index.php
/**
 * User Login
 * url - /login
 * method - POST
 * params - email, password
 */
$app->post('/login', function() use ($app) {
            // check for required params
            verifyRequiredParams(array('email', 'password'));
            // reading post params
            $email = $app->request()->post('email');
            $password = $app->request()->post('password');
            $response = array();
            $db = new DbHandler();
            // check for correct email and password
            if ($db->checkLogin($email, $password)) {
                // get the user by email
                $user = $db->getUserByEmail($email);
                if ($user != NULL) {
                    $response["error"] = false;
                    $response['name'] = $user['name'];
                    $response['email'] = $user['email'];
                    $response['apiKey'] = $user['api_key'];
                    $response['createdAt'] = $user['created_at'];
                } else {
                    // unknown error occurred
                    $response['error'] = true;
                    $response['message'] = "An error occurred. Please try again";
                }
            } else {
                // user credentials are wrong
                $response['error'] = true;
                $response['message'] = 'Login failed. Incorrect credentials';
            }
            echoRespnse(200, $response);
        });
URL/login
MethodPOST
Paramsemail, password
On successful login the following json will be issued.
{
    "error": false,
    "name": "Ravi Tamada",
    "email": "ravi@gmail.com",
    "apiKey": "940bb12af8d7b040876f60f965c5be6d",
    "createdAt": "2014-01-07 23:38:35"
}
If the credentials are wrong, you can expect the following json.
{
    "error": true,
    "message": "Login failed. Incorrect credentials"
}

⇒ Verifying API Key

While dealing with task data, we need to identify the user using the API key in the request header by reading Authorization field. Basically we’ll look into database for matched API key and get the appropriate user. If the API key not present in users table, then we’ll stop the execution and echo the error json.
11. Add the following method in index.php. The method authenticate() will be executed every time before doing any task related operations on database.
index.php
/**
 * Adding Middle Layer to authenticate every request
 * Checking if the request has valid api key in the 'Authorization' header
 */
function authenticate(\Slim\Route $route) {
    // Getting request headers
    $headers = apache_request_headers();
    $response = array();
    $app = \Slim\Slim::getInstance();
    // Verifying Authorization Header
    if (isset($headers['Authorization'])) {
        $db = new DbHandler();
        // get the api key
        $api_key = $headers['Authorization'];
        // validating api key
        if (!$db->isValidApiKey($api_key)) {
            // api key is not present in users table
            $response["error"] = true;
            $response["message"] = "Access Denied. Invalid Api key";
            echoRespnse(401, $response);
            $app->stop();
        } else {
            global $user_id;
            // get user primary key id
            $user = $db->getUserId($api_key);
            if ($user != NULL)
                $user_id = $user["id"];
        }
    } else {
        // api key is missing in header
        $response["error"] = true;
        $response["message"] = "Api key is misssing";
        echoRespnse(400, $response);
        $app->stop();
    }
}
If the api key is missing in the request header, the following json will be echoed with 400 status code.
{
    "error": true,
    "message": "Api key is misssing"
}
If the api key is not valid following json will echoed with 401 status code.
{
    "error": true,
    "message": "Access Denied. Invalid Api key"
}


Api Calls with Authentication (Including API key in the request)
Following are the API calls should have an Api Key in the request header. These api calls primarily deals the user’s task data like creating, reading, updating and deleting.

⇒ Creating New Task

12. Add the follwing method to create a new task. Here you can notice that authenticate method is called to verify the Api key before inserting a new task.
index.php
/**
 * Creating new task in db
 * method POST
 * params - name
 * url - /tasks/
 */
$app->post('/tasks', 'authenticate', function() use ($app) {
            // check for required params
            verifyRequiredParams(array('task'));
            $response = array();
            $task = $app->request->post('task');
            global $user_id;
            $db = new DbHandler();
            // creating new task
            $task_id = $db->createTask($user_id, $task);
            if ($task_id != NULL) {
                $response["error"] = false;
                $response["message"] = "Task created successfully";
                $response["task_id"] = $task_id;
            } else {
                $response["error"] = true;
                $response["message"] = "Failed to create task. Please try again";
            }
            echoRespnse(201, $response);
        });
URL/tasks
MethodPOST
Paramstask
On successful creation of new task following json will be issued. If you got this json, you can see new row inserted in tasks and user_tasks tables.
{
    "error": false,
    "message": "Task created successfully",
    "task_id": 1
}

⇒ Getting All Tasks

13. Following method will list down all user’s tasks. We don’t have to submit any params for this api call.
index.php
/**
 * Listing all tasks of particual user
 * method GET
 * url /tasks         
 */
$app->get('/tasks', 'authenticate', function() {
            global $user_id;
            $response = array();
            $db = new DbHandler();
            // fetching all user tasks
            $result = $db->getAllUserTasks($user_id);
            $response["error"] = false;
            $response["tasks"] = array();
            // looping through result and preparing tasks array
            while ($task = $result->fetch_assoc()) {
                $tmp = array();
                $tmp["id"] = $task["id"];
                $tmp["task"] = $task["task"];
                $tmp["status"] = $task["status"];
                $tmp["createdAt"] = $task["created_at"];
                array_push($response["tasks"], $tmp);
            }
            echoRespnse(200, $response);
        });
URL/tasks
MethodGET
Params-
Following json will be issued for list of tasks. The “tasks” represents list of tasks as an array. Also if the “status” is 0, that means the task is not done yet.
{
    "error": false,
    "tasks": [
        {
            "id": 1,
            "task": "Complete REST article by Sunday",
            "status": 0,
            "createdAt": "2014-01-08 23:35:45"
        },
        {
            "id": 2,
            "task": "Book bus tickets!",
            "status": 0,
            "createdAt": "2014-01-08 23:56:52"
        }
    ]
}

⇒ Getting Single Task

14. Following method will fetch details of single task. You need to append the task id with a / to url. For an example if you want details of task 15, the url will be /tasks/15.
index.php
/**
 * Listing single task of particual user
 * method GET
 * url /tasks/:id
 * Will return 404 if the task doesn't belongs to user
 */
$app->get('/tasks/:id', 'authenticate', function($task_id) {
            global $user_id;
            $response = array();
            $db = new DbHandler();
            // fetch task
            $result = $db->getTask($task_id, $user_id);
            if ($result != NULL) {
                $response["error"] = false;
                $response["id"] = $result["id"];
                $response["task"] = $result["task"];
                $response["status"] = $result["status"];
                $response["createdAt"] = $result["created_at"];
                echoRespnse(200, $response);
            } else {
                $response["error"] = true;
                $response["message"] = "The requested resource doesn't exists";
                echoRespnse(404, $response);
            }
        });
URL/tasks/id (id should be replaced with task id)
MethodGET
Params-
The details of a single task will be in following json format.
{
    "error": false,
    "id": 2,
    "task": "Book bus tickets!",
    "status": 0,
    "createdAt": "2014-01-08 23:56:52"
}
If you pass a task id which is not there in the database, you will get 404 not found error.

⇒ Updating Task

15. Following code will take care of updating a task. The url for this api call is same as getting the details of single task, only difference is we should use PUT method instead of GET.
index.php
/**
 * Updating existing task
 * method PUT
 * params task, status
 * url - /tasks/:id
 */
$app->put('/tasks/:id', 'authenticate', function($task_id) use($app) {
            // check for required params
            verifyRequiredParams(array('task', 'status'));
            global $user_id;           
            $task = $app->request->put('task');
            $status = $app->request->put('status');
            $db = new DbHandler();
            $response = array();
            // updating task
            $result = $db->updateTask($user_id, $task_id, $task, $status);
            if ($result) {
                // task updated successfully
                $response["error"] = false;
                $response["message"] = "Task updated successfully";
            } else {
                // task failed to update
                $response["error"] = true;
                $response["message"] = "Task failed to update. Please try again!";
            }
            echoRespnse(200, $response);
        });
URL/tasks/id (id should be replaced with task id)
MethodPUT
Paramstask, status (0 or 1)
Upon successful updation you will get following json.
{
    "error": false,
    "message": "Task updated successfully"
}

⇒ Deleting Task

16. Again delete task url is same as update task, but this requires DELETE method.
index.php
/**
 * Deleting task. Users can delete only their tasks
 * method DELETE
 * url /tasks
 */
$app->delete('/tasks/:id', 'authenticate', function($task_id) use($app) {
            global $user_id;
            $db = new DbHandler();
            $response = array();
            $result = $db->deleteTask($user_id, $task_id);
            if ($result) {
                // task deleted successfully
                $response["error"] = false;
                $response["message"] = "Task deleted succesfully";
            } else {
                // task failed to delete
                $response["error"] = true;
                $response["message"] = "Task failed to delete. Please try again!";
            }
            echoRespnse(200, $response);
        });
URL/tasks/id (id should be replaced with task id)
MethodDELETE
Params-
You will get following json if the task is deleted successfully.
{
    "error": false,
    "message": "Task deleted succesfully"
}
Here we completes the PHP and MySQL part. Now it’s time to move on to testing the API just to make sure that whatever code we have written is working.

Testing the API

Following is the list of URL we need to test using Chrome Advanced REST client extension with possible combinations of inputs.
URLMethodParametersDescription
http://localhost/task_manager/v1/registerPOSTname, email, passwordUser registration
http://localhost/task_manager/v1/loginPOSTemail, passwordUser login
http://localhost/task_manager/v1/tasksPOSTtaskTo create new task
http://localhost/task_manager/v1/tasksGETFetching all tasks
http://localhost/task_manager/v1/tasks/:idGETFetching single task
http://localhost/task_manager/v1/tasks/:idPUTUpdating single task
http://localhost/task_manager/v1/tasks/:idDELETEtask, statusDeleting single task
The following video shows you how to test the API thoroughly.